-
First Look on Source Manager of Mail for Sage
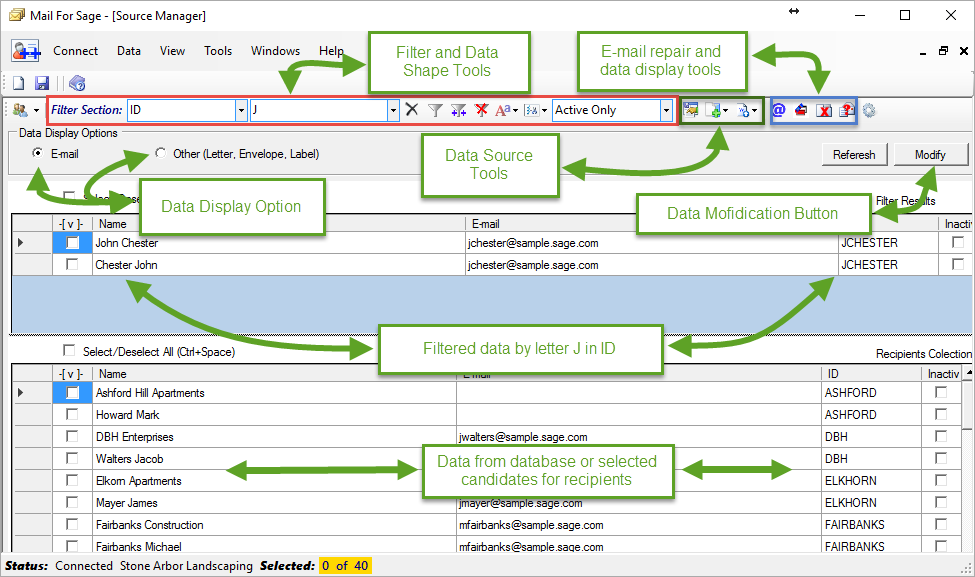
Mail for Sage is extremely simplified. It make the program easy to operate for everybody. When you install run it, the Source Manager window is going to appear and let you connect to the Sage database. When application will connect successfully it is going to display records of customers or vendors. The type of records is depending on you own choice. It will remember you last selection of data group but it is necessary that the first choice you are going to make manually using [Data] button. [Data] button is part of the Menu Bar
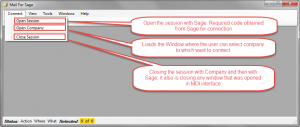
You can use the Menu Connect -> Open Session and Connect -> Open Company buttons in order to activate the connection to Sage.
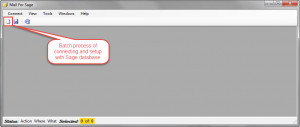
The alternative option is the Batch button being probably more convenient. It is located in the Toolbar below the Menu Bar. It is automatically step by step connecting to the Sage and then consequently to the Business. Most of all it is operating until the application is going to successfully display the data in the Grid View (Tables)
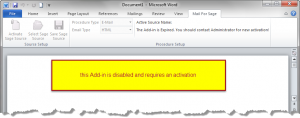
In order to create and send the newsletter first the Data Source has to be created in the Source Manager. However, if you open the source manager for the first time make sure that the Word Add-in is activated.
AcMailSender is Add-in that is installed in MS Word. Is going to help you send the e-mails or print final documents with or without personalized envelops. The Add-in is creating the ribbon named Mail For Sage that is located on the top of Word beside all other ribbons.
Add-in requires activation from Data Source Manager

-
Activate the Mail for Sage MS Word Add-in
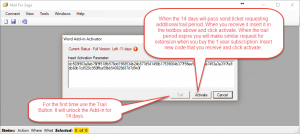
In order to activate Add-in first you have to click [Help] button located on the Menu bar. Next click the [Add-in Activation] button. You will find it on the bottom of the list that [Add-in Activation] button is going to respectfully display below.
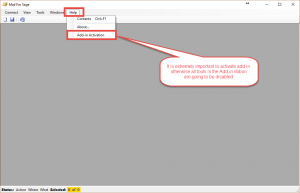
Furthermore it will open the Activation interface where you have two options.
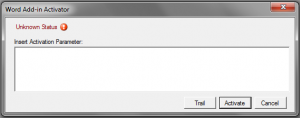
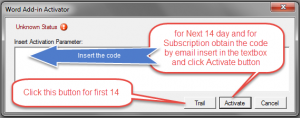
- First of all you have to click the [Trail] button. This action will activate the Add-in for first 14 days no questions asked.
- Finally, the second part of the trail requires the code that can be obtained by e-mail.
You don’t have to send any information to us in order to activate the second part of trail. We need at most the ID of the Application that is in the primary window that is opening everytime you load the application.
There images below are showing you how to get the Application ID.
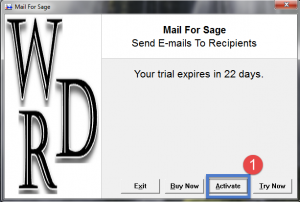
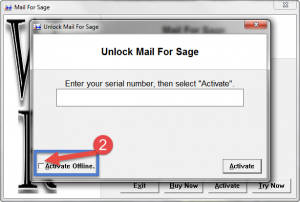
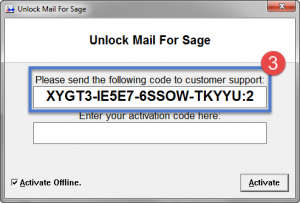
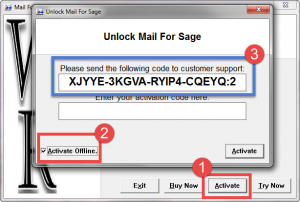
You need to send a copy of that number and if you qualify you receive the second part of the trail otherwise, you will have to buy the subscription. You don’t need separate subscription for Add-in. The subscription for the Mail for Sage is the only that you require
Finally, when you buy the subscription for Mail for Sage you will receive the activation code for add-in. Only this time you need to send the confirmation of the purchase.
More about how to buy and install subscription you will find in Part 2

